There was a problem loading the comments.

How To Get Started with Sermon Shots (Tutorial Video)

Support Portal  »  Knowledgebase  »  Viewing Article

  Print

Welcome to Sermon Shots! Creating impactful sermon clips has never been easier. With Sermon Shots, you can quickly transform your messages into high-quality, engaging social media content in just a few simple steps!


Watch this short video for a quick overview on how to get the most out of your Sermon Shots account. 

0a64ad41f581cfcc4f6c6d2c14002b4541b2a563f331722b94be60b799bf944d9aab492083748a98?t=0ea9e2e17da923e554e1a28201f71faf


1. Upload Your Sermon

You can easily upload directly from your computer or device, or use the “Upload from YouTube” button located at the top right. Simply paste the YouTube URL of your sermon and hit “submit.” But that’s not all! We also offer some awesome options for video submission, including Live Stream, Vimeo, Facebook, Dropbox, Google Drive, From this Device, and even StreamingChurch.TV, giving you multiple ways to share your content with us.


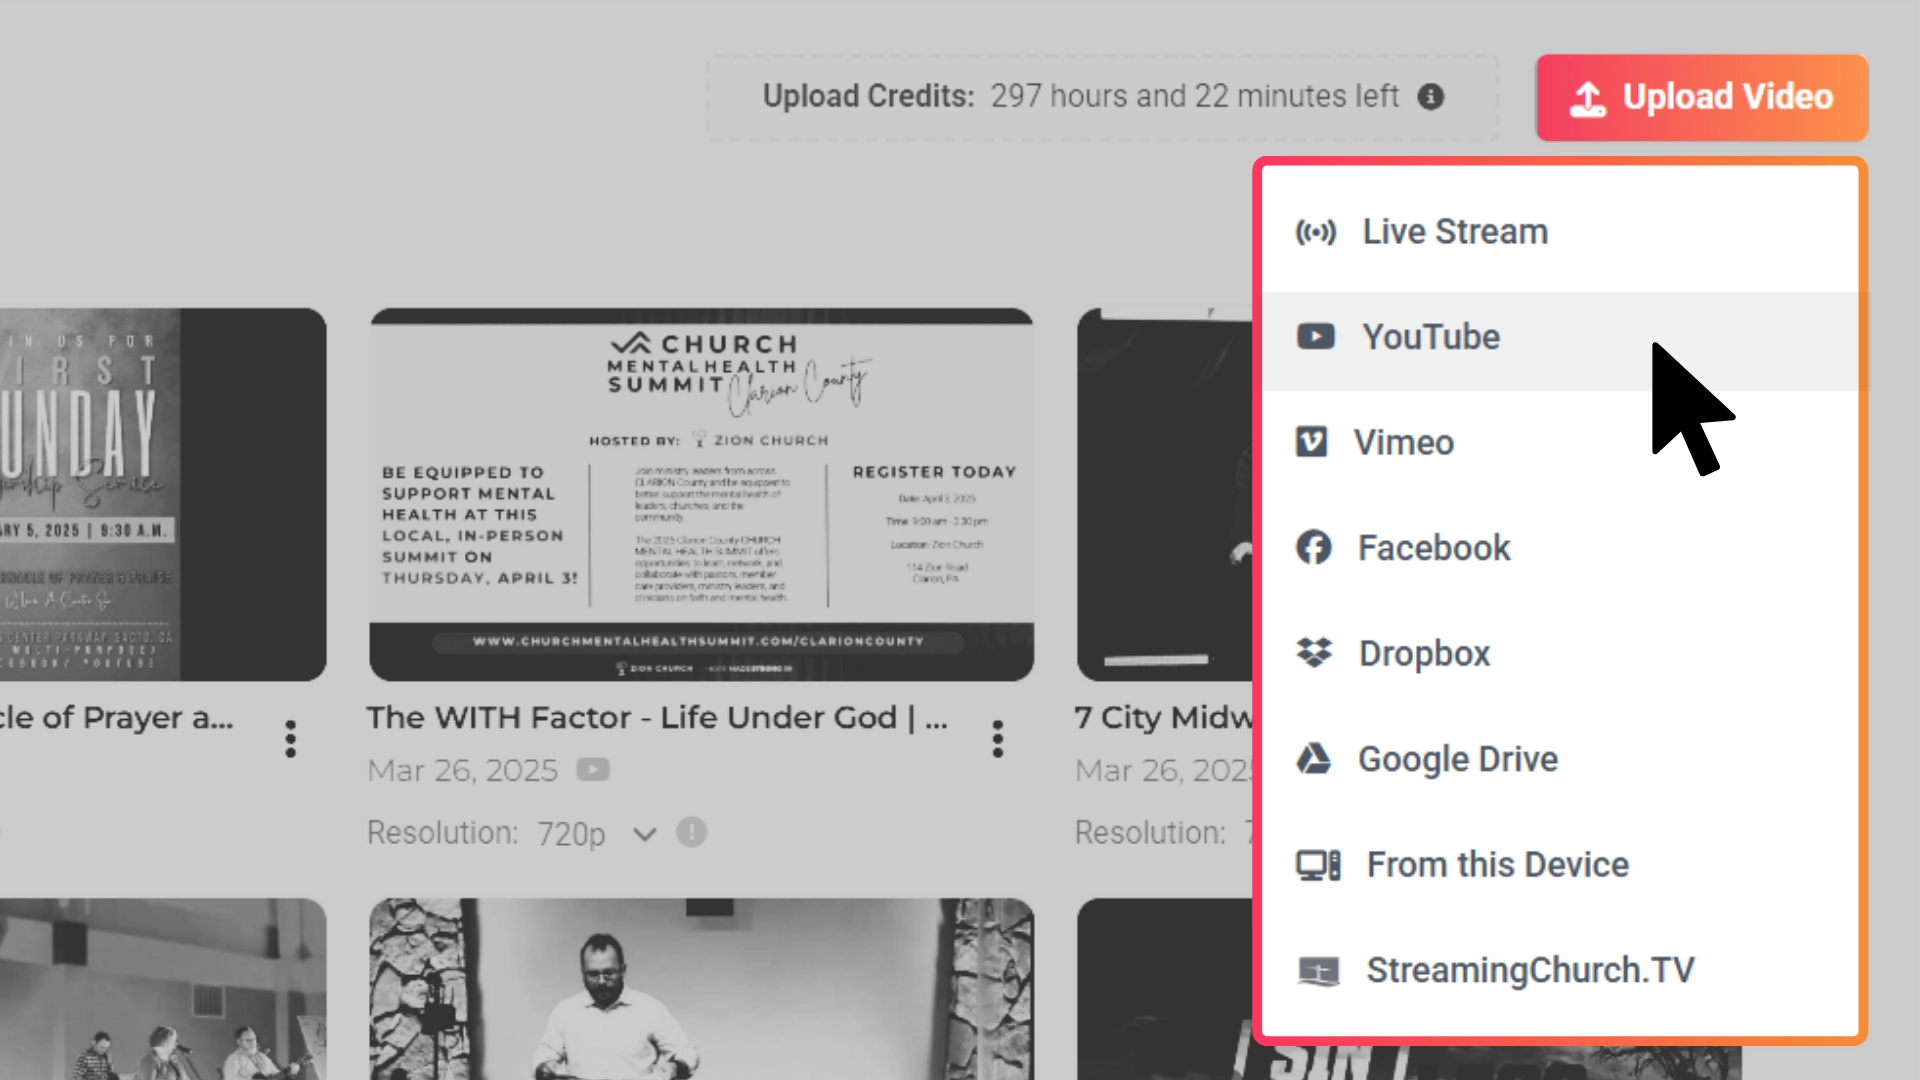
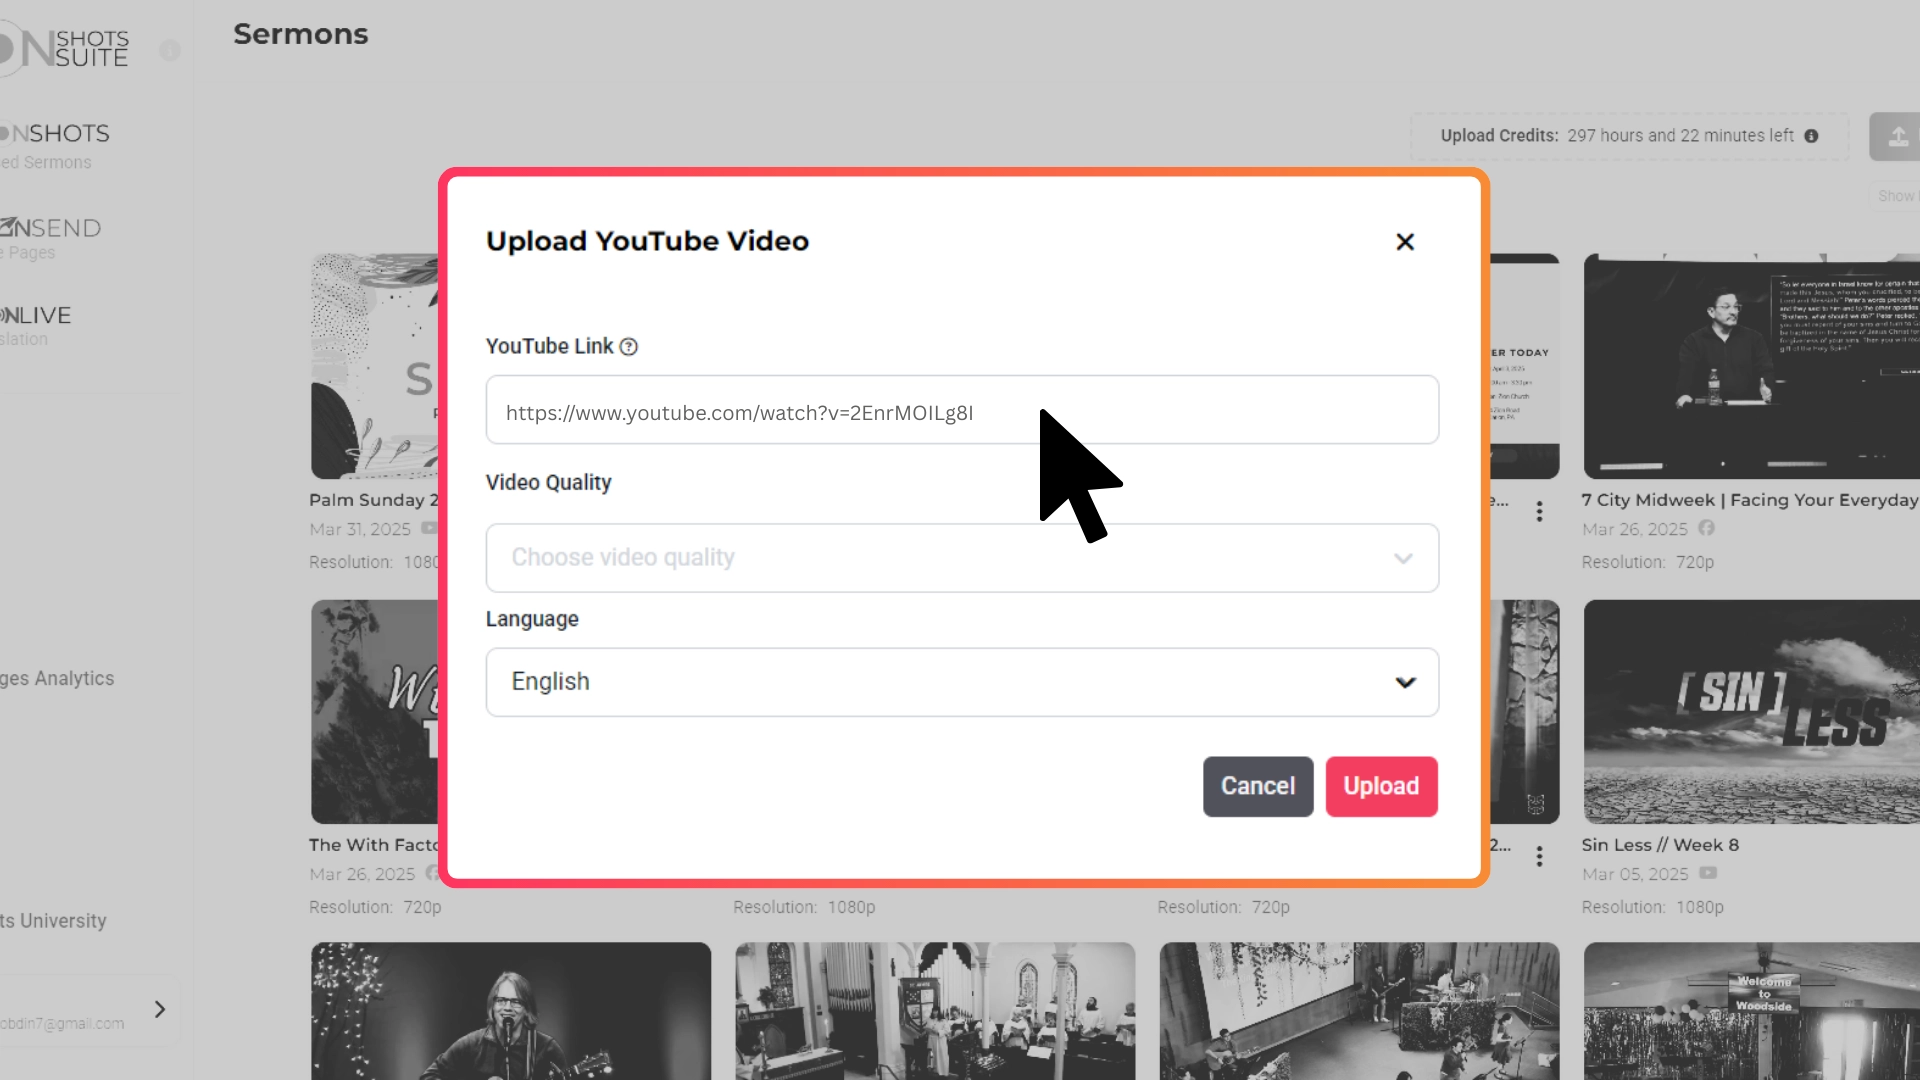
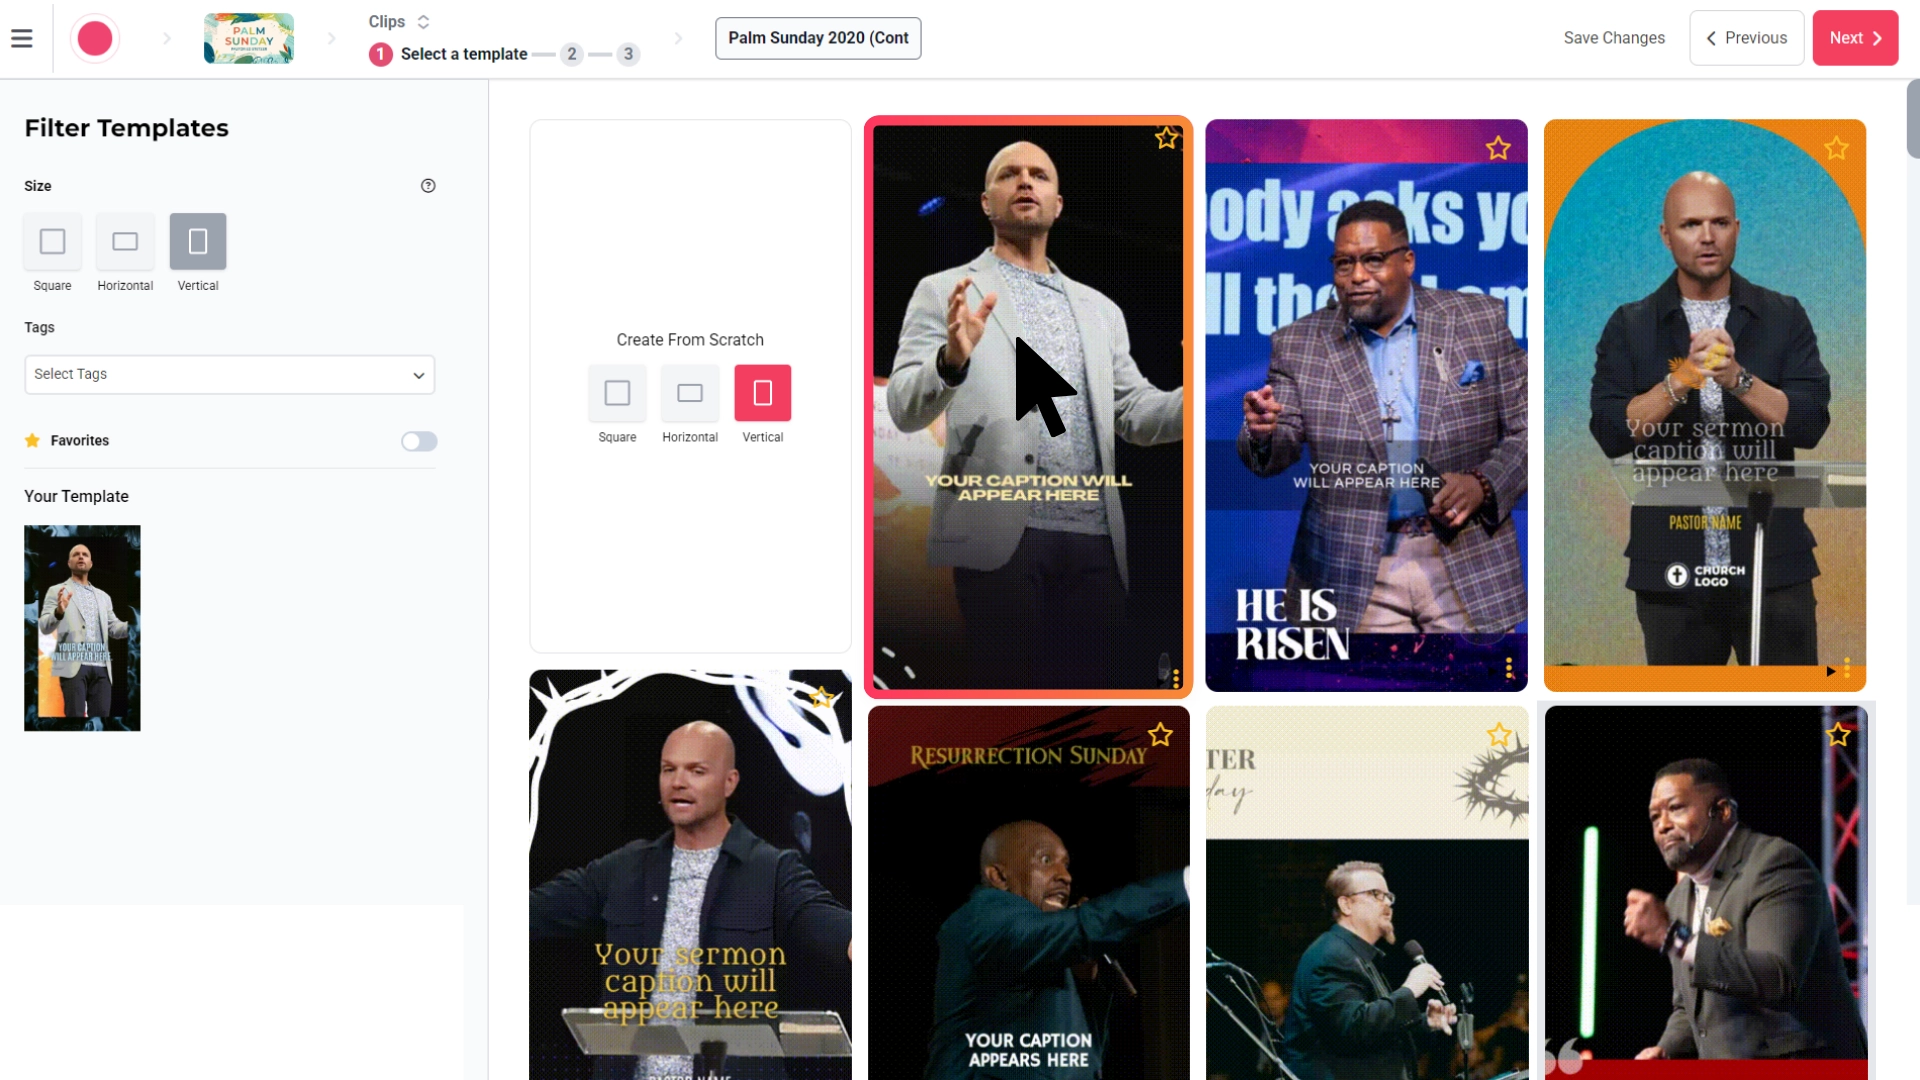
Important: Before uploading your sermon, you must switch the language setting from the default English to your desired language. The language selector will be visible in the upload interface.

393606fa834293aa770bd9d1af54f127444f1eb91c9032a59fd8ca89aab608ee0c32f8d85c68a77e?t=aef5500daf2ee42647b8c446680d68a2


2. Select a Template/Design

You can filter by keyword – these are design elements like “Close Up”. You can also filter the template library by posting format: square, vertical, or horizontal. After you select your template, click “next” in the top right corner.


Tip: Use vertical for Reels and TikTok. Use square for Instagram and Facebook posts. Horizontal should be limited to longer YouTube videos. It *can* be used as a Facebook post, but square is better.


3. Find the Clippable Moment with AI Suggested Clips or Select Yourself [Search Like a Word Document]

This step is what makes Sermon Shots so quick and easy to use!


Option 1: AI Suggested Clips:

The entire sermon has been transcribed. This makes your sermon searchable like a Microsoft Word document. Use the search bar above the displayed transcript to enter a keyword or phrase from the sermon. Sermon Shots will tell you how many times that word or phrase was found and take you right to the first result in both the transcript and the video. Use the down arrow to advance to the next result.

Select the text you want to be included in the clip by hitting the [+]plus button on each text box. You can even listen through to make sure that’s exactly what you want by hitting play. You can pick one continuous portion or select from different sections of the message to combine more than one point into the clip. Check out the “time duration” at the bottom of the tool to track how long your clip will be. When you’re finished selecting the text, click “next” again.”


Option 2: Select Yourself:

The entire sermon has been transcribed. This makes your sermon searchable like a Microsoft Word document. Use the search bar above the displayed transcript to enter a keyword or phrase from the sermon. Sermon Shots will tell you how many times that word or phrase was found and take you right to the first result in both the transcript and the video. Use the down arrow to advance to the next result.

Select the text you want to be included in the clip by hitting the [+]plus button on each text box. You can even listen through to make sure that’s exactly what you want by hitting play. You can pick one continuous portion or select from different sections of the message to combine more than one point into the clip. Check out the “time duration” at the bottom of the tool to track how long your clip will be. When you’re finished selecting the text, click “next” again.


4. Make Final Edits

Now preview the full video by clicking “play”. Additional edits and improvements are available. You can change colors, fonts, add your logo, add a title, adjust your caption size, and more. You can also add background music to give the video some extra emotion. You can select from music already available on the tool or upload your own from your computer. You can also turn on AI Camera Crew for your clip! This is a facial tracking or auto-reframe option that will keep your speaker in view at all times.


5. Social Site Previews

Click on the “Preview On” Button to see exactly how your clip will look on the different social media platforms.


6. Download and Share on Social Media

You have two file options when downloading: High Quality and Smaller Size. The High Quality option is ideal for manually posting your content directly to your platform of choice. The Smaller Size option is tailored for those using social schedulers, as many of these services require a slightly smaller MP4 file to schedule content in advance.

Additionally, when you download, you’ll receive three sets of suggested captions and hashtags. These sets are designed to help boost engagement and reach on your posts. Choose the one that best fits your message, or customize them further to suit your needs. After downloading, the video and captions are yours to share anywhere you like!

Tip: When posting to social media, add a short description of the video along with popular hashtags to reach more people and increase your chances of virality.


Sermon Shots does more than just create sermon clips. Learn more about our features


Need Help? 

If you have any questions or need assistance, feel free to contact our support team at contact@sermonshtos.com


Share via

Related Articles

© Sermon Shots