What It's For
This feature is ideal for users who:
- Have a specific design vision that doesn't match existing templates
- Need to create something unique or highly customized
- Prefer to start with a clean canvas
- Want full control over the layout and elements
- Want to create simple videos with captions and logos
How to Use the Create from Scratch Feature
Step-by-Step Guide
Step 1: Upload Your Video
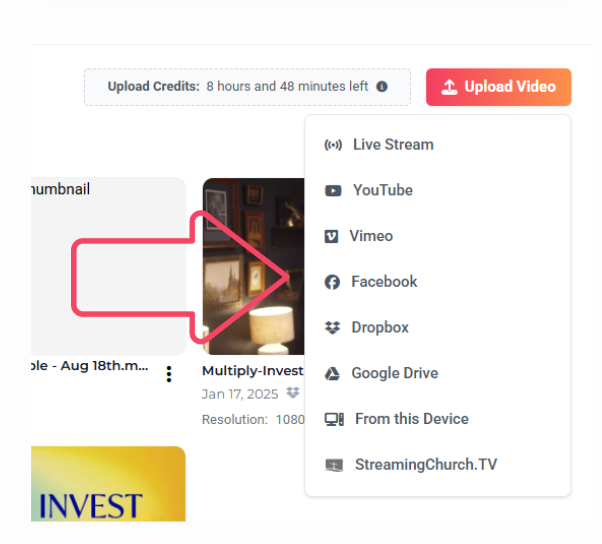
- Start by uploading a video.
- Choose one of the eight options for importing content: YouTube Link, LiveStream, Vimeo, Facebook, Dropbox, Google Drive, StreamingChurch.TV, or from your computer.
Step 2: Select your Sermon
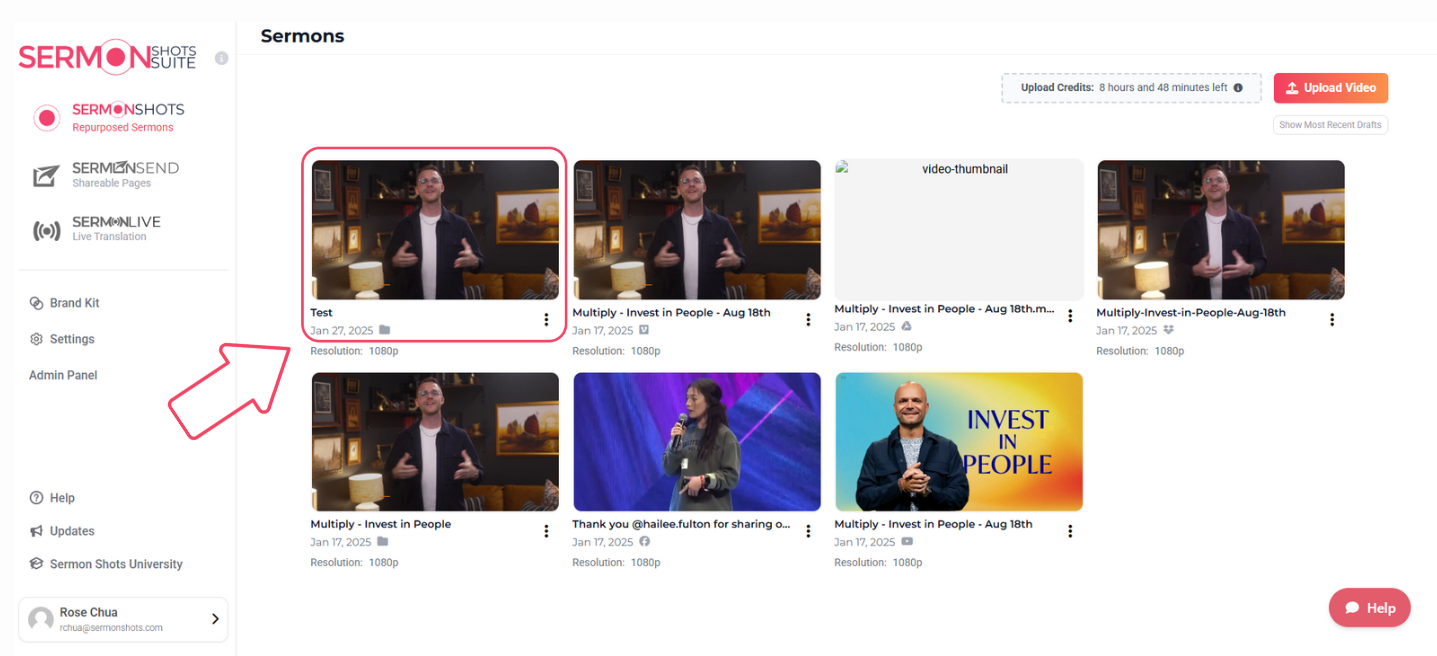
- Once your video is loaded, click on the specific message you want to work with.
Step 3: Choose "Create from Scratch" Template
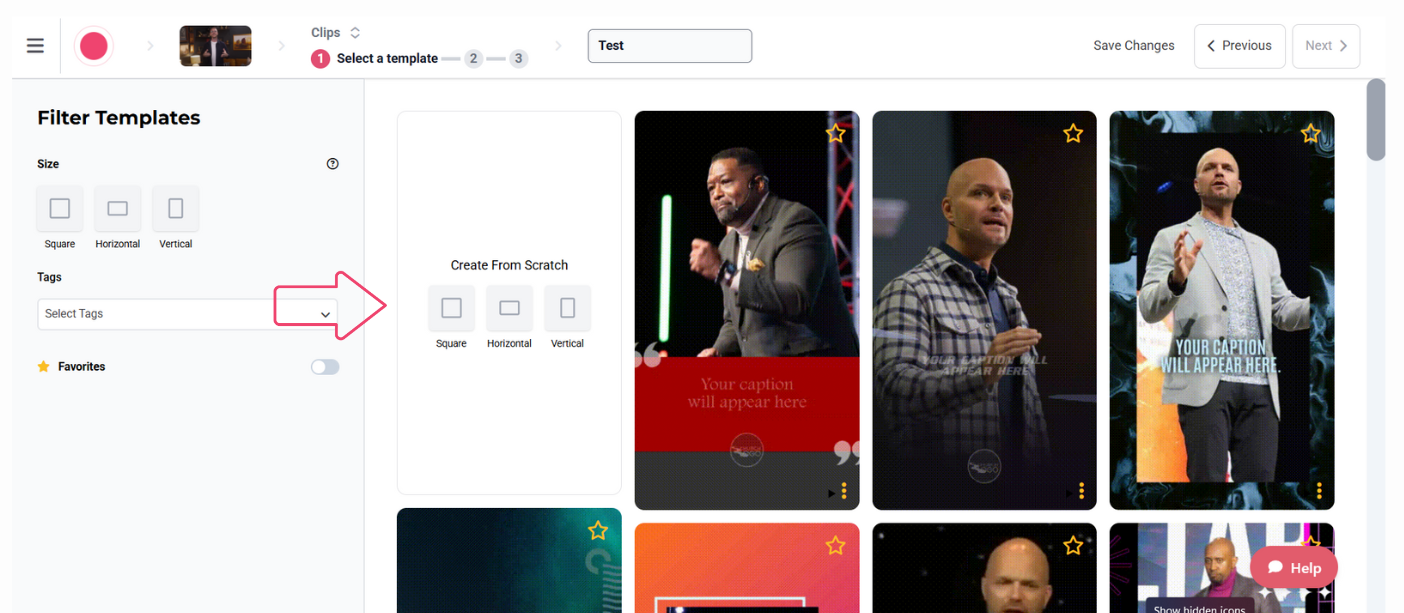
- Navigate to the template options
- Select the "Create from Scratch" option to begin with a blank canvas
- Choose to create a Square, Horizontal or Vertical template
- This will give you full creative freedom for your project
Step 4: Add Captions to Your Video
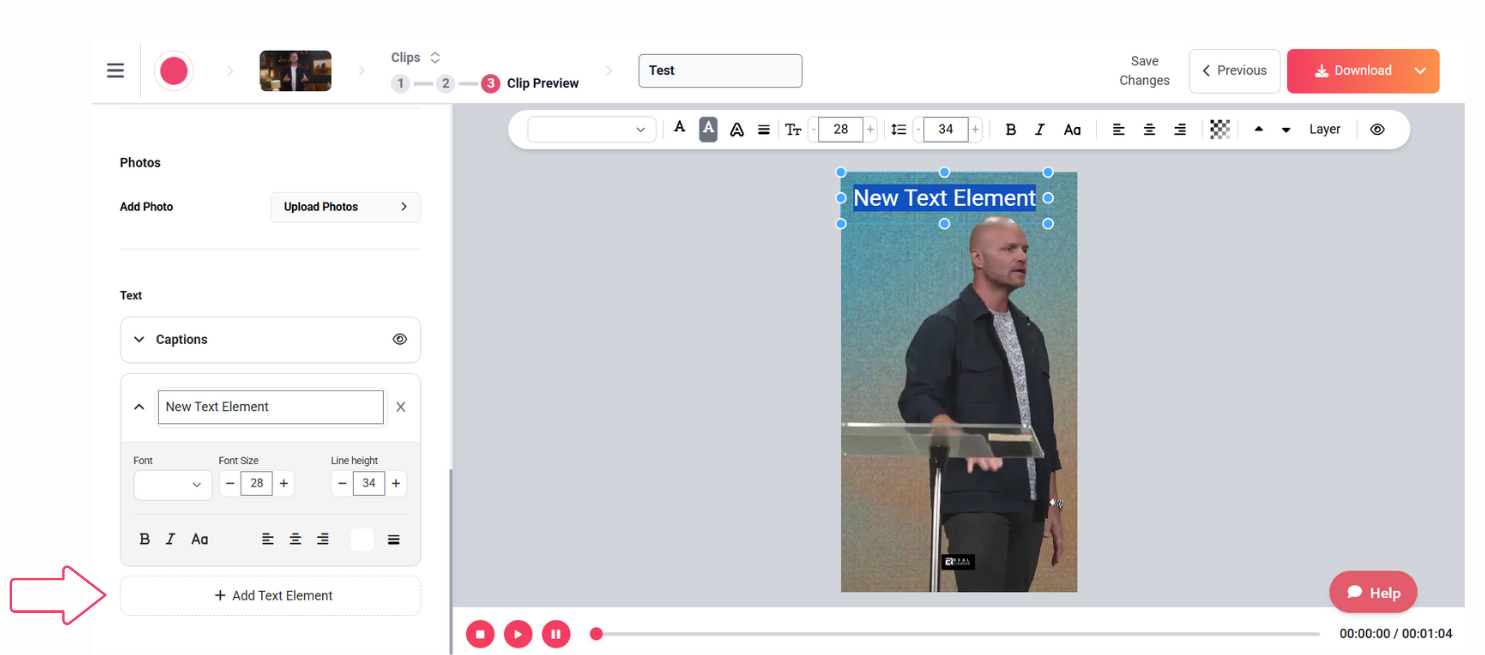
- Use the text tool to add caption boxes
- Position them appropriately on your video
- Customize font, size, and color to match your brand style
Step 5: Add Your Logo and Images
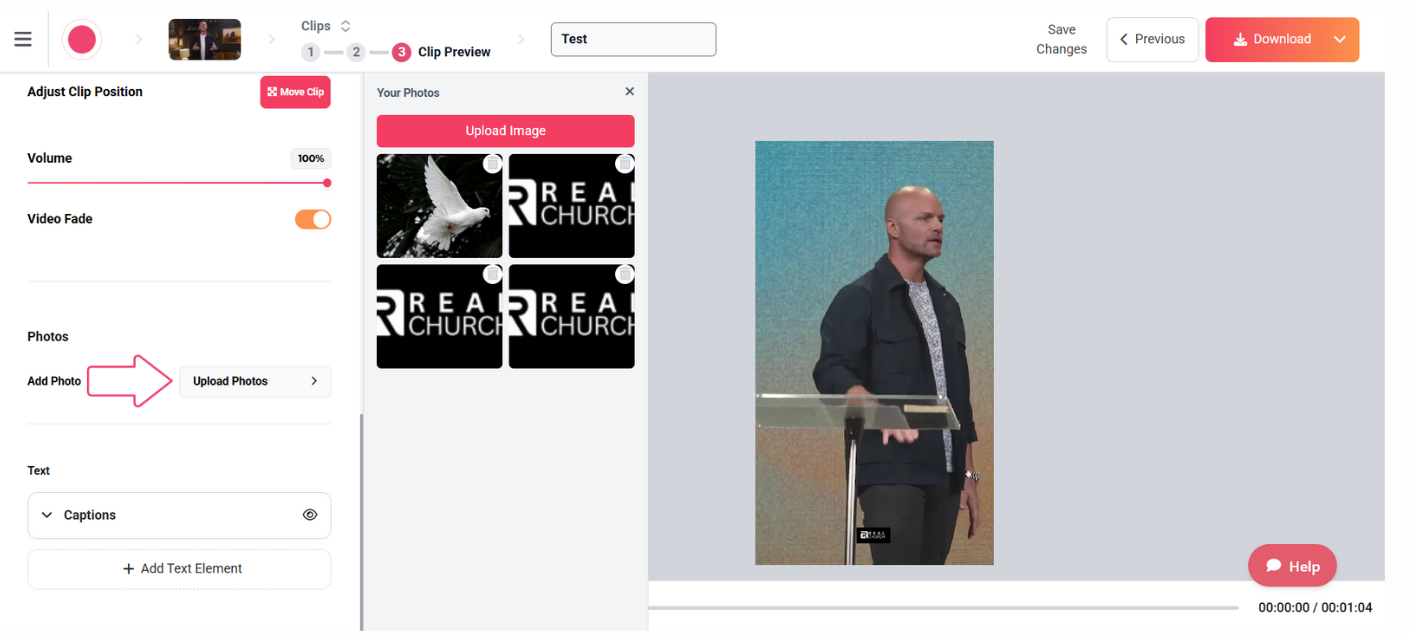
- Click the upload image button
- Upload your organization's logo to brand your content
- Add any additional images you'd like to include
- Position and resize all visual elements as needed
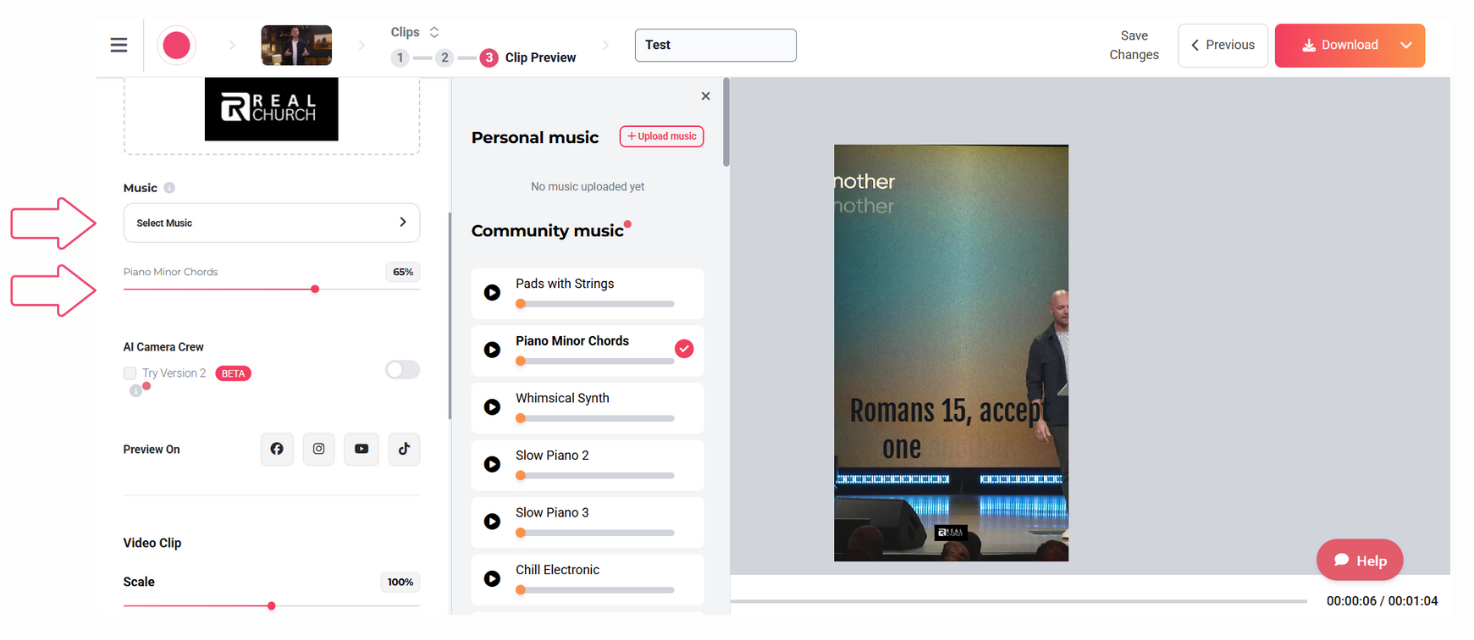
Step 6: Add Music and Audio Elements
- Add background music if desired
- Adjust volume levels to balance with your video's original audio
- Make sure audio enhances rather than distracts from your message
Step 7: Fine-tune and Customize
- Use drag-and-drop functionality to position all elements
- Adjust colors, transparency, and other visual aspects
- Preview your creation to ensure everything looks as intended
Step 8: Save and Export Your Work
- Name your project when prompted
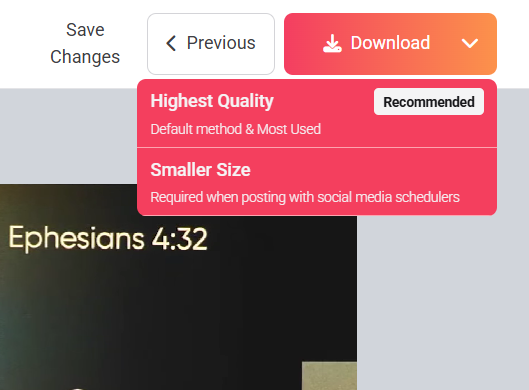
- You can save your creation manually by clicking on "Save Changes". The app automatically saves your clip every 5 seconds.
- Export in the appropriate format for your intended platform.
Tips for Success
- Plan your layout before you begin
- Start with larger elements and work toward details
- Remember to save your work regularly
- Consider starting with basic structure elements before adding detailed content
- Take advantage of the drag-and-drop functionality to easily position elements
- Use the preview function to see how your content will appear on different platforms
Limitations
The "Create from Scratch" template currently offers fewer built-in customization options compared to pre-designed templates. However, this limitation is balanced by the complete creative freedom it provides for creating simple videos with captions, logos, images, and music.