Accessing Caption Editing
- Create Your Clip: After uploading your sermon audio and generating your clip, you'll be taken to the editing interface.
- Choose a template on Step 1
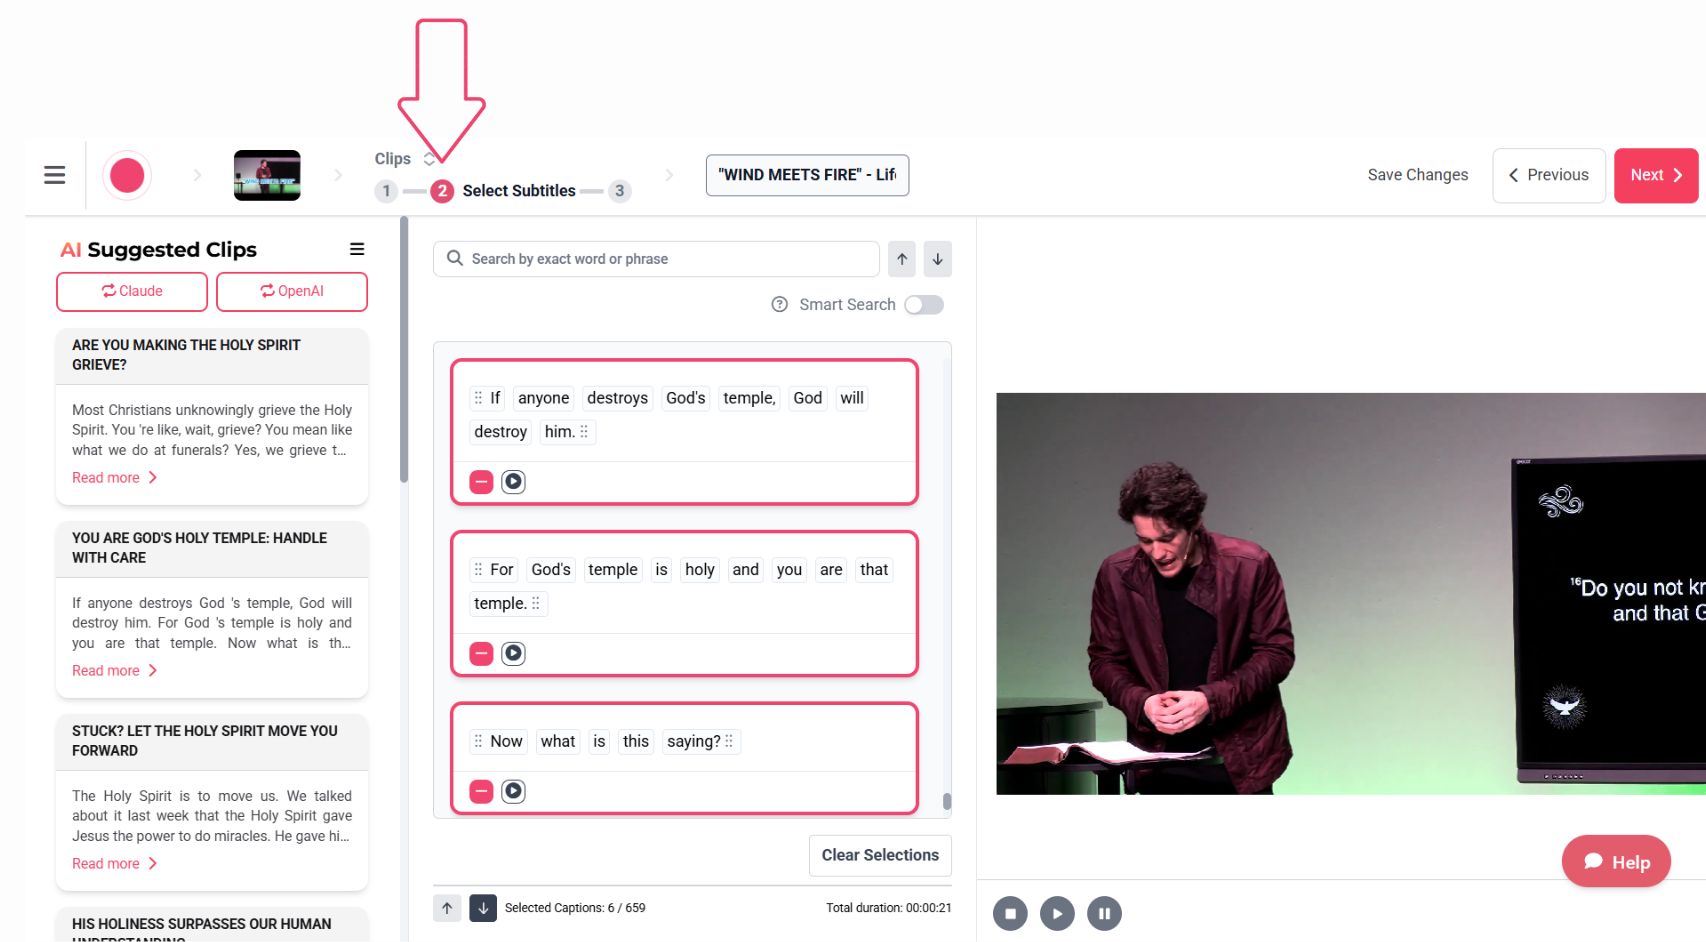
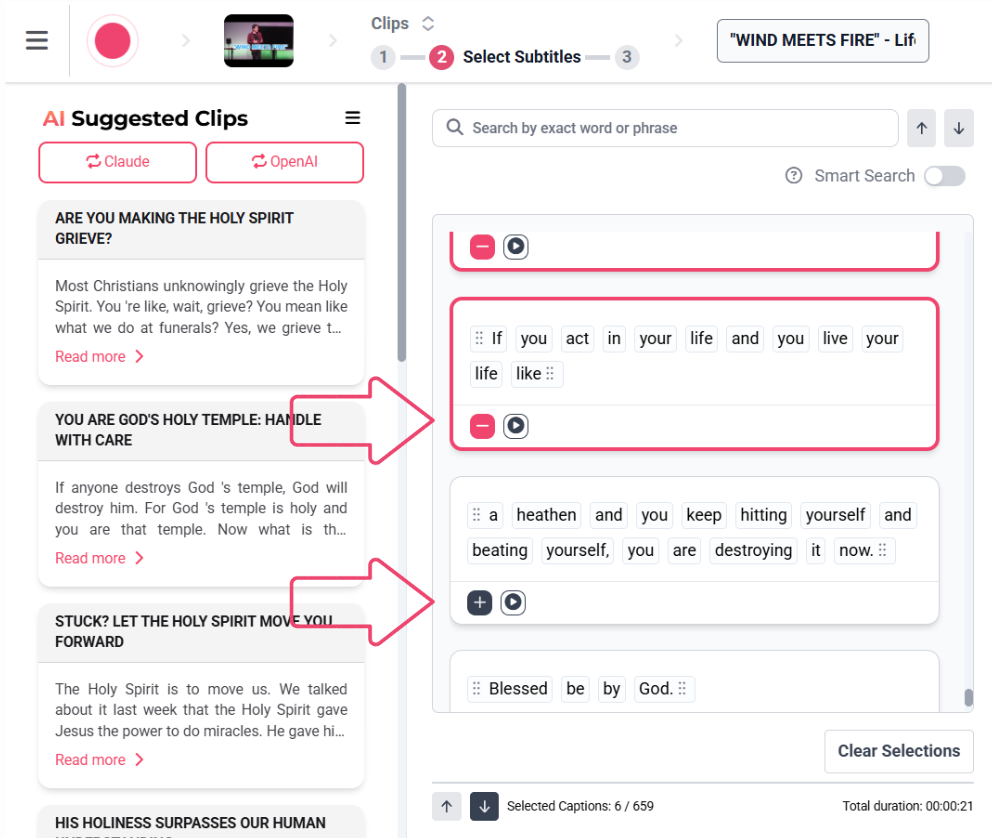
- Click Next to get to Step 2: The caption editing tools are located in Step 2 of the clip creation process, where you can see your video preview alongside the caption text blocks.
Updating Spelling, Punctuation, and Capitalization
To Edit Your Captions:
- Click on the Word in the text box: Click directly on the specific word that needs to be changed (for example, click on "Forward" if it should be "Ford", or click on "john" if it should be "John", or click on "Gods" if it should be "God's").
- Type the Correction: Type the correct word to replace the incorrect one. Make corrections to spelling mistakes, punctuation errors, or capitalization issues. Pay special attention to:
- Biblical references and book names
- Theological terminology
- Proper nouns (names, places)
- Sentence capitalization
- Save Changes: Clicking "Next" will automatically update the transcription and will be reflected on Step 3.
If this doesn't work and you're still seeing the incorrect words in Step 3, here's what you can do:
Removing Duplicate Words:
Sometimes the transcription may fail to automatically remove duplicate words in your captions (like "the the" or "in in"). Here's how to remove them:
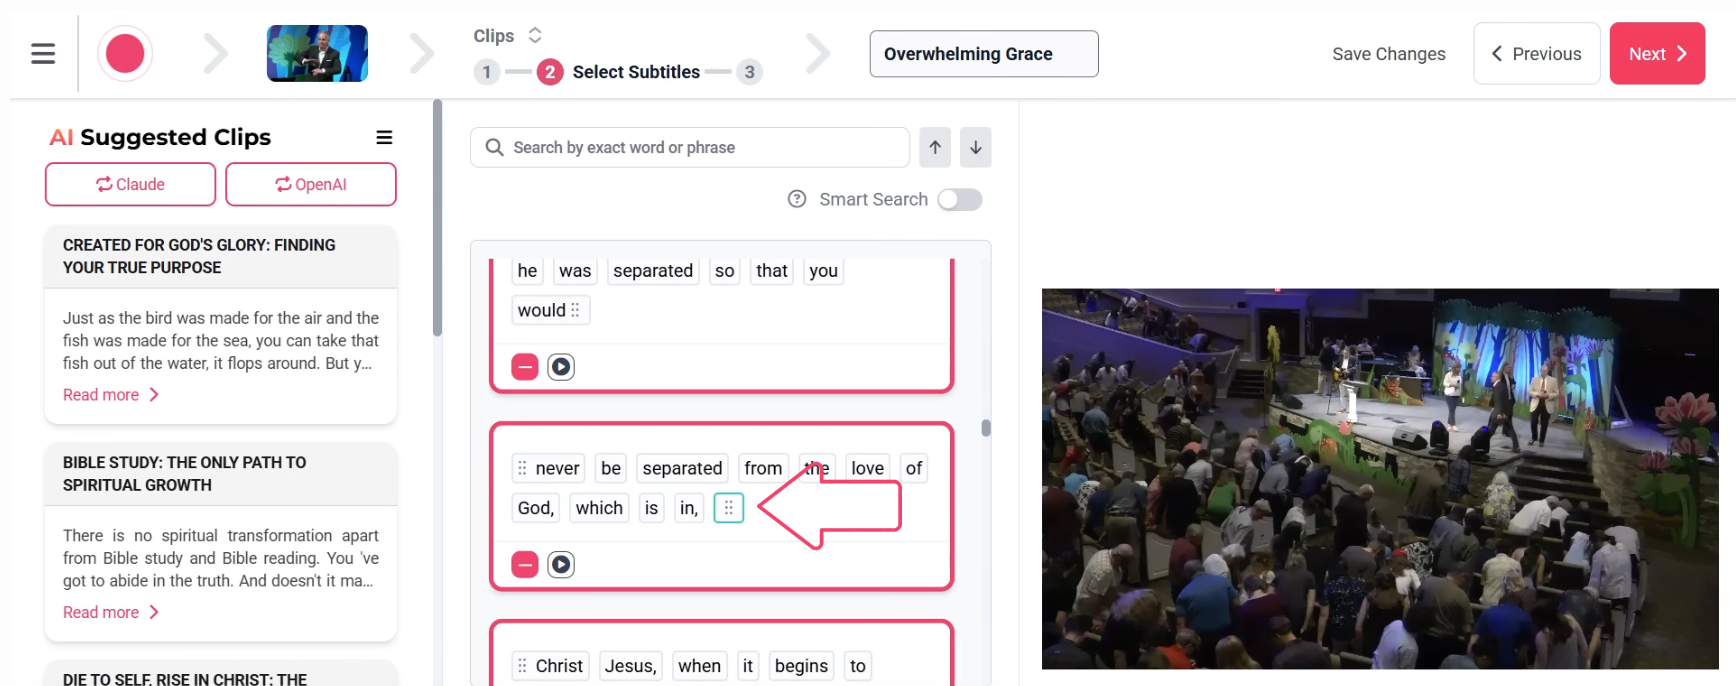
- Locate the Duplicate: In Step 2, scan through your caption blocks to identify any duplicate words.
- Click directly on one of the duplicate words to select it.
- Simply delete the extra word, leaving only one instance in the caption.
- Review the Flow: Check that the remaining text flows naturally and makes sense in context.
🛠️ If the Changes Aren't Sticking:
Sometimes edits may not save properly. If this happens, you can recompile the clip using these steps:
- Go back to Step 2
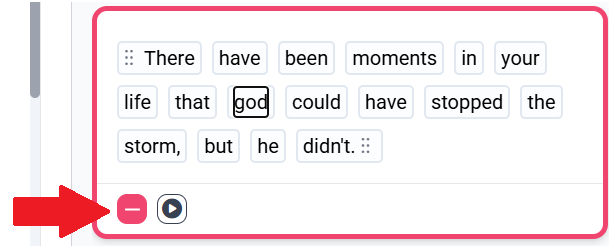
- Remove the sentence block with the word that has the wrong spelling (by clicking on the red minus ➖ sign)
- Go to Step 3 and wait for it to finish rendering
- Go back to Step 2
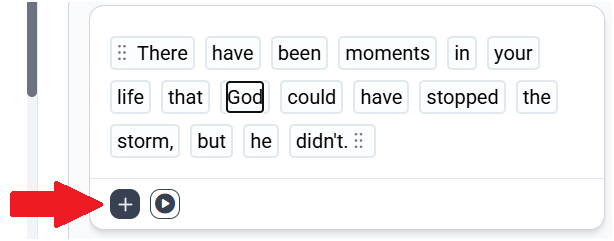
- Correct the spelling of the word and add the sentence block back (by clicking on the black plus ➕ sign)
- Go to Step 3 and wait for it to finish rendering
This should help recompile the clip and update it with the correct spelling.
Resizing Caption Font
While there isn't a direct way to adjust the font size of captions since it's dynamic, you can adjust the size of the box that holds the caption, and the font size will be adjusted automatically as well.
- In Step 3, click on the caption text box that appears over your video content.
- Click and drag the corners or edges of the caption box to make it larger or smaller. As you resize the box, the font size will automatically adjust to fit the new dimensions.
- Play the video to view the changes in real-time in your video preview to ensure optimal readability for your audience.
- For a visual walkthrough of this process, watch How to Resize Caption Font.
Excluding Parts of Your Clip
Method 1: Using Plus and Minus Signs
- Each sentence block has a plus sign (+) and minus sign (-) next to it in the editing interface.
- The plus sign (+) indicates you can add the sentence block to appear as captions in your video.
- Click the minus sign (-) to exclude any sentence blocks you don't want to appear as captions.
Method 2: Removing Specific Words From the Captions
- Click on the Word: Click directly on the specific word you want to remove from the caption text.
- Delete the Word: Simply delete the word from the text block. This will remove it from the caption display but will not be cut out of the clip.
Method 3: Excluding Words from the Clip
If you want to exclude just a few words instead of sentences, here's how:
-
To exclude a few words from the clip, move the corresponding text to an unselected sentence box.
- Drag and drop the unwanted text boxes from selected blocks into unselected sentence blocks.
- For a visual walkthrough of this process, watch Editing Video Captions Explained tutorial.
Undo Tip: If you accidentally delete a caption box or make unwanted changes, you can quickly undo your action by pressing Ctrl+Z on Windows or Cmd+Z on macOS to restore your previous edits.
Best Practices
- Test Font Size: Consider your target audience and viewing platforms when choosing font size. Test on different devices for optimal readability.
- Review for Accuracy: Carefully review automatically generated captions, especially technical or theological terms that may have been transcribed incorrectly.
- Maintain Natural Flow: When editing caption content, ensure the timing still feels natural and synchronized with the audio.
- Keep it Readable: Break up long sentences into shorter, more digestible caption blocks for better viewer comprehension.
If you encounter any issues or have questions about editing captions for your Sermon Shots clips, the support team is available to assist you.
Contact support at contact@sermonshots.com.